
I’ve continued aiming my attention on Mammie’s 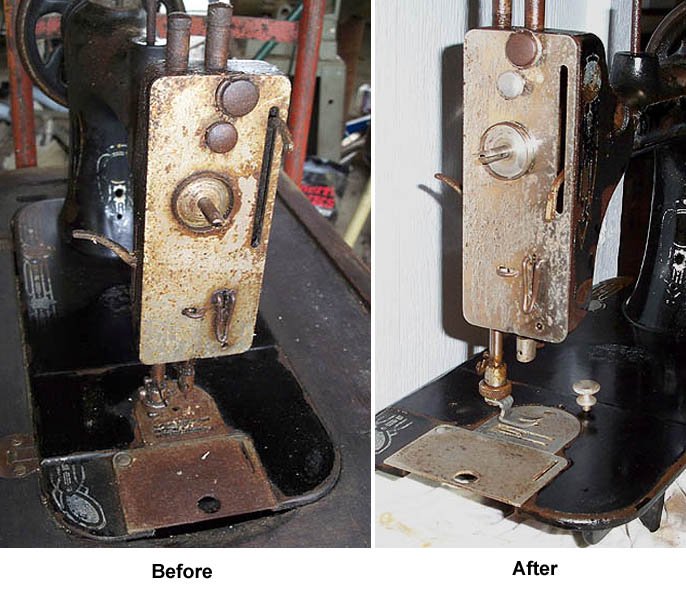 National sewing machine; working on more detail cleaning, de-sludging and rust removal. After reading some articles about cleaning vintage machines, I decided to soak the rusty face, bobbin and needle plates in a vinegar/salt solution. Without precise measuring, I used a concentration of around 2 cups of 5% white vinegar (enough to cover the parts) and 1-2 tablespoons of Kosher salt. I allowed them to soak for 6 hours; then rinsed the parts and soaked them again in a similar solution for another 6 hours. When I thought they were as clean as possible without further pitting the finish, I rinsed the parts well and waxed them with automotive carnuba wax. Though the parts are still rough, I’m quite pleased with the result. I can always decide later to work further on these parts but it felt like time to move on to the next step.
With the entire machine begging for attention, I decided to next concentrate on the bobbin area.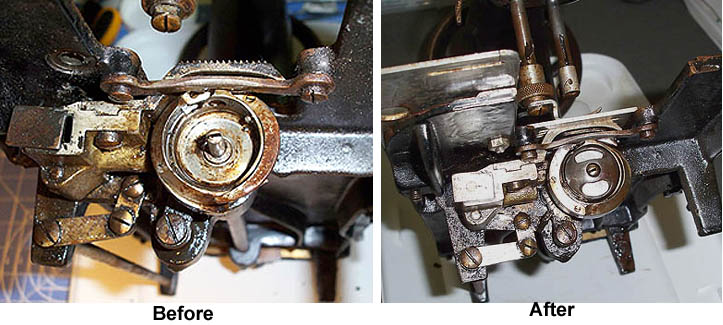
Upon receiving this machine, I was extremely pleased to find the bobbin case and a bobbin of thread in the machine. I discarded the old, rotten thread and cleaned the bobbin and case with machine oil and a worn green pad. It cleaned to my satisfaction.
The bobbin/feed dog area required some careful scraping and prodding with an exacto knife, stiff artist brushes and dental tools. After removing the oily lint and wiping the area, the feed dogs are clean. I did much the same around the bobbin area to remove old oil and sludge. It’s clean enough and moves freely. I applied a thin layer of fresh oil.
The next area I’ve worked is the side behind the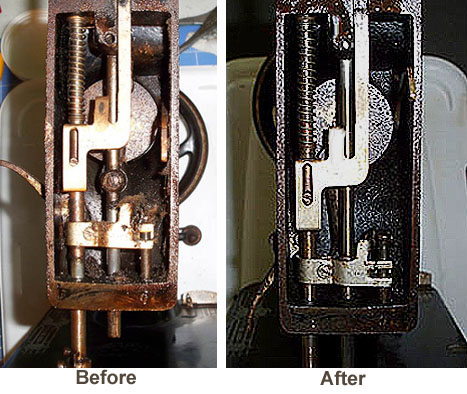 faceplate. It was equally as grungy as the rest of the machine. With stuff brushes and oil, I was able to rid the area of sludge. At this point, I’ve decided unless I completely disassemble the machine and sonically clean each part, there’s little hope of making the machine pristine. Everything will remain ‘good enough’.
I decided to give some attention to the other end of the machine. Although the hand wheel and bobbin winder parts move freely, they are encased in rust. I’d like to try improving their looks. I’ve tried removing the huge flatslot screw holding the bobbin winder to the machine. No luck, even after being soaked in oil for months. I even tried walloping the screwdriver with a rubber mallet but the screw still will not budge. Heck, so much of this machine needs attention, I decided to skip working on the bobbin winder at this time and concentrate on the hand wheel.
I’ve found instructions for removing a Singer hand wheel on the 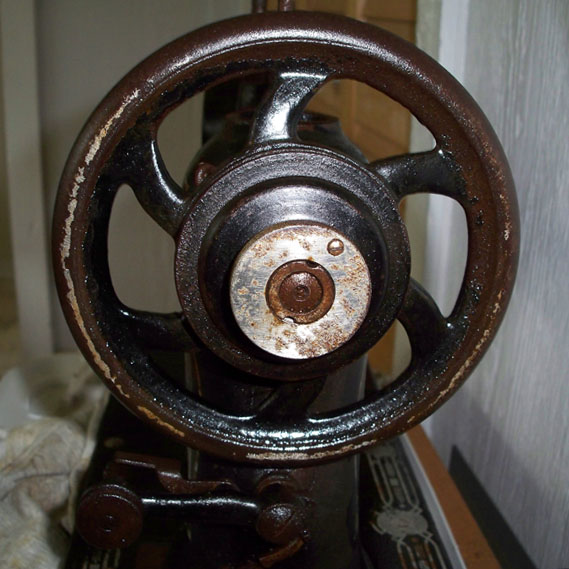 Net. As recommended, I photographed each part as it was removed and laid them in order on a clean rag. Unfortunately, I ran into a dead end. After pinching and scraping a few knuckles, hitting it with a rubber mallet and cursing, the hand wheel remains steadfast. I just can’t figure out how it comes apart. I decided it would be a better option to reassemble the hand wheel and walk away from the machine. After unsuccessfully trying to disassemble both the bobbin winder and hand wheel, I could feel my frustration mounting. It was time to point my attention in another direction.
A few days have since passed and I’ve re-oiled the machine head and placed it back into it’s padded box. I will continue to research how to move forward with this machine and know I will soon return to it, fresh and undefeated.
In the meantime, I have quilts to finish and clothing to sew on any of several vintage, working machines.
I really want to sew on a treadle!
More soon.
Shirl
By Shel Fri Sep 6th 2013 at 12:10 pm
I’m really amazed at your ‘after’ photos……it’s really coming cleaner than I would have thought possible…..so….you must be pleased!!
By Tanit-Isis Sun Sep 8th 2013 at 10:11 am
Wow, what an amazing improvement! I can’t believe it spent so many years in an open shed. (yikes!) Your after shots are looking great—at least as good as the working National I have. My great-grandmother, too, had an Eaton’s treadle, but I haven’t been able to figure out what happened to it. I wonder if it’s sitting out in a shed somewhere on the farm… >_<